Wireless Remote Sensor

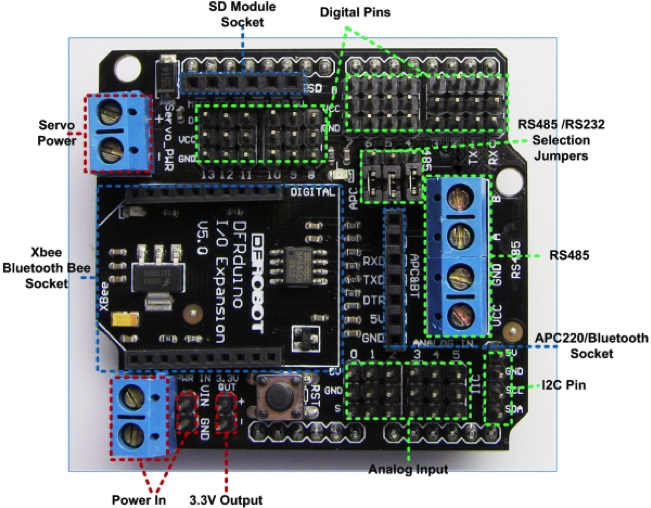
Sensor data from the ultrasonic sensor can be sent to remote machines. Many choices can be made. Here in this example, in order to send data a Bluetooth module will be used. A Bluetooth module cannot be connected to the Arduino without using an extra parts. The IO Expansion Shield from DFRobot.com is one of options.

The DF-BluetoothV3 Bluetooth module (SKU:TEL0026) is compatible with the IO Expansion. This combination makes me easier when it comes to adding a Bluetooth module. Using this we can simply add wireless capability into the Arduino. The next step is to attach the ultrasonic sensor to the IO expansion board.

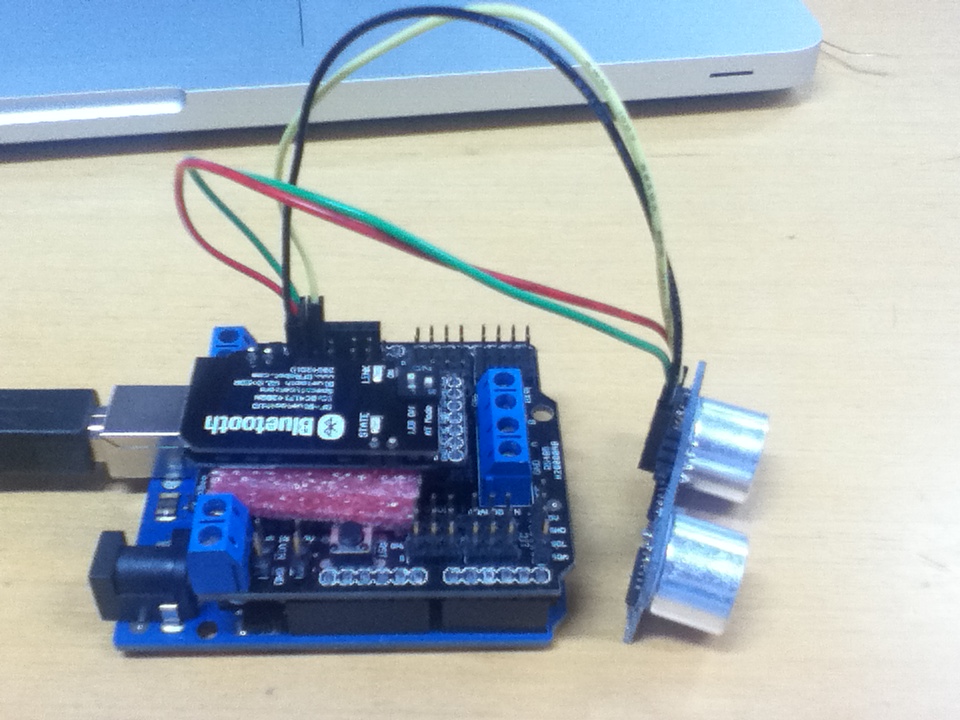
On the expansion board, there are digital and analog pins that are connected to corresponding pins to the Arduino board. Make sure that pins for TRIGGER and ECHO from the ultrasonic sensor are connected to the IO expansion board according to the pin usage in the source code that is used in the previous posting. The picture below shows the assembled module.

Note that the Bluetooth module should be disconnected when a binary is being uploaded. Anyway, the exact same code from the previous posting can be used so that you do not need to upload a new binary.

The next step is that making pairs between the computer and the Bluetooth module. By doing this, from the computer  communicating with a Bluetooth module is now just simple serial communications.

Detail steps depend on the operating system. Followings are from Mac OS X. Choose the Set Up Bluetooth Devices menu item. Select the Bluetooth_V3 item.

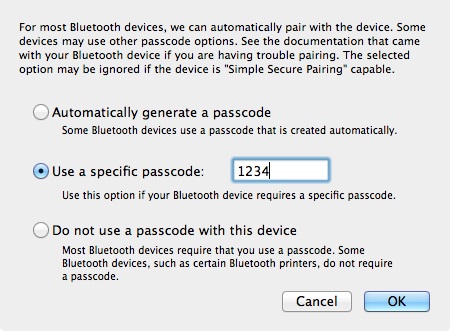
The default passcode of the Bluetooth module is ‘1234.’ When you are prompted use the passcode.

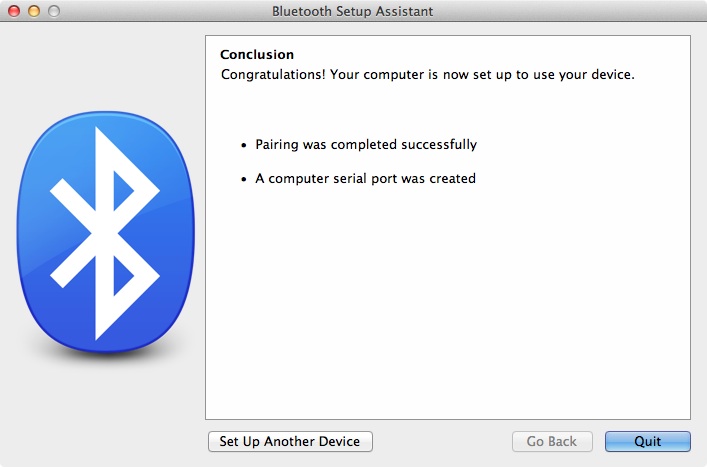
When the pairing is completed successfully the window below will be shown.

Practically we are done. Open any terminal software for serial communication. I recommend CoolTerm that can be downloaded from here.

One extra optional step is visualizing the sensor data. Processing (processing.org) is used to visualize sensor data from the Bluetooth module. I made the visualization code as simple as possible.

 
import processing.serial.*;
// screen width
int maxWidth = 800;
int maxHeight = 100;
int lf = 10;

// The serial port
Serial myPort;
float gCurDist;
Graph gGraph;

void setup() {
  // List all the available serial ports
  println(Serial.list());

  // Open the port you are using at the rate you want:
  // You may change the index number accordingly.
  myPort = new Serial(this, Serial.list()[0], 9600);
  myPort.bufferUntil(lf);

  // myPort = new Serial(this, "/dev/tty.Bluetooth_V3-DevB", 9600);
  size(maxWidth, maxHeight);
  smooth();

  gGraph = new Graph(700, 80, 10, 10);
}
void serialEvent(Serial p)
{
  String incomingString = p.readString();
  println(incomingString);
  String[] incomingValues = split(incomingString, ',');

  if(incomingValues.length > 2) {
    float value = Float.parseFloat(incomingValues[1].trim());
    gCurDist = value;
    //println(gCurDist);
  }
}
void draw() {
  background(224);
  gGraph.distance = gCurDist;
  gGraph.render();
}
class Graph {
  int sizeX, sizeY, posX, posY;
  int minDist = 0;
  int maxDist = 500;
  float distance;

  Graph(int _sizeX, int _sizeY, int _posX, int _posY) {
    sizeX = _sizeX;
    sizeY = _sizeY;
    posX = _posX;
    posY = _posY;
  }

  void render() {
    noStroke();
    int stemSize = 30;

    float dispDist = round(distance);
    if(distance > maxDist)
      dispDist = maxDist+1;
    if((int)distance < minDist)
      dispDist = minDist;

    fill(255,0,0);
    float distSize = (1 - ((dispDist - minDist)/(maxDist-minDist)));
    rect(posX, posY, sizeX-(sizeX*distSize), sizeY);
  }
}

Ultrasonic Sensor

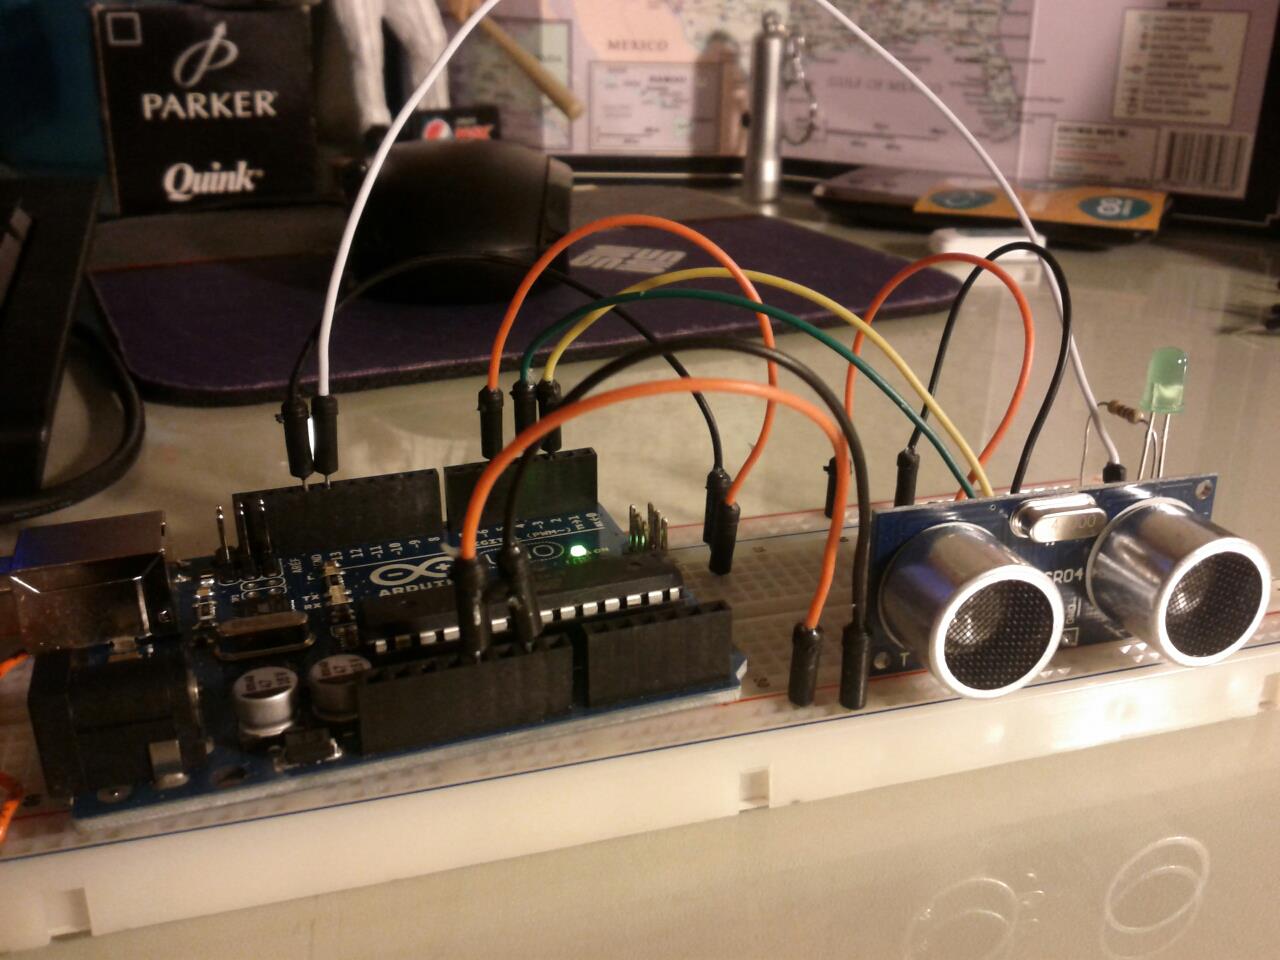
Ultrasonic sensor test. It works. Nice.

Ultrasonic sensor module is HC-SR04. I purchased this from virtuabotix.com. The company provides a Ultrasonic library.

  • Go to https://www.virtuabotix.com/feed/?page_id=1587 and find the Ultrasonic section.
  • Download the library.
  • Unzip it and copy the unzipped folder to your Arduino libraries folder.
  • You may restart Arduino to let it recognize the new library.
  • Use an example code for your starting step.

Here is the example.

#include <Ultrasonic.h>
#define TRIGGER_PIN 12
#define ECHO_PIN 13
Ultrasonic ultrasonic(TRIGGER_PIN, ECHO_PIN);
void setup()
{
  Serial.begin(9600);
}
void loop()
{
  float cmMsec, inMsec;
  long microsec = ultrasonic.timing();
  cmMsec = ultrasonic.convert(microsec, Ultrasonic::CM);
  inMsec = ultrasonic.convert(microsec, Ultrasonic::IN);
  //Serial.print("MS: ");
  Serial.print(microsec);
  Serial.print(", ");
  //Serial.print(", CM: ");
  Serial.print(cmMsec);
  Serial.print(", ");
  //Serial.print(", IN: ");
  Serial.println(inMsec);
  delay(1000);
}

Just wire pins as the source code says. Then open the Serial Monitor from Arduino. You will see he raw milliseconds and distance in centimeter and inch.

That’s it.

Arduino books

Get my feet wet with Arduino. I like the tiny book, Programming Arduino, Getting Started with Sketches. This book is well organized and pretty much informative. Arduino Cookbook is a good reference book that covers a lot of specific topics. Two project driven books also worth to read and obviously to do.

AT&T U-Verse Wireless Connection Problem with Apple Devices

I have been using AT&T U-verse since last year. It has been better than AT&T DSL service which I used prior to U-verse. But sometimes the internet connection was not successful from only my Apple devices. Actually the fact that the problem is only from Apple devices was known to me quite lately. My son is using a Windows laptop. I found out that he never complained about his connection. I am not sure that my wired connection was also problematic since I didn’t check it because most of my networked devices are wireless.

I asked AT&T technical support to help me. They  were very kind and eager to solve my problem. After listening to my problem, the technical support changed my modem settings. I believed it helped since I didn’t have the disconnection problem anymore. But another problem, maybe more serious one arose. Network speed got seriously slow down. I called again AT&T technical support. All they said was that my modem and wire were OK. The technical support asked me to cold-reset my modem. So I did. The speed came back to normal. I believed that it helped and solved the problem. But it was not. The network speed got slow down again after a while.

I had decided to solve this problem by myself and checked out some relevant articles from the Internet. Many complaints existed here and there. But there were not many clear answers for the problem. So, my second approach was to check out my son’s Windows laptop which was getting network connection even though all my Apple devices weren’t. I found out the laptop’s wireless setting was using WPA-Personal as the wireless security. So I changed the security setting of my MacBook Pro’s AirPort. It didn’t solve the problem. I googled one more time. And I found an interesting answer for this disconnection problem. The guy said that the modem’s wireless setting should be changed.

I figured out that Apple’s AirPort Security settings have missing compared to Windows wireless settings. Among authentication types of WPA and WPA2, we can choose either TKIP or AES in the Windows settings but not in the AirPort settings. I suspected that Apple devices do not support one of types. The default setting of the U-verse modem is  “WPA-PSK (TKIP) and WPA2-PSK (AES).” I selected “WPA2-PSK (AES)” “WPA-PSK(TKIP)” instead of the default setting and clicked the ‘save’ button. This solved my wireless connection problem of my Apple devices without sacrificing network speed.

Here is a short version of what I did to solve my problem.

  1. Start a web browser. Go http://192.168.1.254
  2. Click the “Wireless” icon on the “Home” screen or select the “Settings” tab –> LAN –> Wireless. Either can bring you to the same setting page.
  3. Scroll down to the Security section.
  4. Select “WPA2-PSK (AES)” “WPA-PSK(TKIP)” in the Authentication Type.
Then, you may change your Windows Wireless settings to use WPA2-PSK (AES) WPA-PSK(TKIP) on your Windows machines if it is selected with (TKIP) something else.

App Inventor for Android

I started learning how to use App Inventor. A few things that I should have known.

  1. App Inventor doesn’t require Android SDK.
  2. App Inventor is a web-based app but App Inventor for Android Blocks Editor is a Java-based app requiring JDK 1.6.
  3. Must install App Inventor Setup that is a supplementary tool set.
  4. Blocks Editor cannot find an emulator when TeamViewer is running.

How Learning Works

This is a brief introduction to seven research-based principles for smart teaching in the book: How Learning Works. I summarize an email news letter from Tomorrow’s Teaching and Learning.

What is learning?

  • Learning is A process not a product
  • Learning involves change in knowledge, beliefs, behaviors, or attitudes.
  • Learning is not something done to students but rather something students themselves do.

Seven principles of learning?

  1. Student’s prior knowledge can help or hinder learning.
  2. How students organize knowledge influences how they learn and apply what they know.
  3. Students’ motivation determines, directs, and sustains what they do to learn.
  4. To develop mastery, students must acquire component skills, practice integrating them, and know when to apply what they have learned.
  5. Goal-directed practice coupled with targeted feedback enhances the quality of students’ learning.
  6. Students’ current level of development interacts with the social, emotional, and intellectual climate of the course to impact learning.
  7. To become self-directed learners, students must learn to monitor and adjust their approaches to learning.